In order to fully benefit from the invoice features your Crunch account has to offer, you’ll need to have set up your clients and included their contact information - if you haven’t yet done this, or would like some help amending existing client information, please check out the guide for setting up your clients.
Watch our bite-sized walkthrough video
You can use the checkpoints placed in the video to skip to where you need to be.
Pro-tip: If you're using Google Chrome, double right-click anywhere inside the video while it’s playing and select 'Picture-in-picture' to watch while you complete the steps when logged into Crunch!
Step-by-step instructions
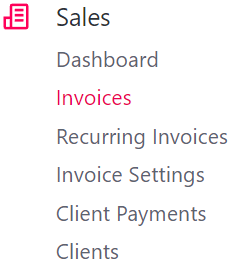
To begin creating a new sales invoice, navigate to the 'Sales > Invoices':
Select the ‘( + )’ button in the bottom right of your account:
Invoice Basics
The first part of the form allows you to choose who you’re about to raise the invoice for by using the list of clients you’ve set up:
If your client doesn’t appear in this list, don’t worry, you can quickly create a new client by selecting the ‘+New Client’ button and, once you’ve saved their details, it’ll bring you back to your new invoice - check out this guide if you need more help setting up a new client.
Next up, you can start to enter the invoice details:
Select either a specific historical date or use the 'When issued' option. This uses whatever date it is when you issue the invoice in Crunch.
Reference:
Optional. Use this to add any reference you like. This can be handy if you use timesheets and want to reference their numbering.
Note:
Optional. Add a note for your client.
PO number:
Optional. You can enter purchase order numbers if applicable.
Tip: Crunch uses an automatic invoice numbering system once a sales invoice has been issued - this means that your first sales invoice will reflect 001/0001 and will then increase in number with each invoice thereafter.
Invoice Items
Here is where you specify what you're invoicing your client for. Simply enter a brief description of the work and how much you need to charge them.
If you’re VAT registered: Crunch will automatically calculate the correct amount of VAT to include on your invoice.
You can either enter the net amount in the 'Price' box and Crunch will add the VAT on top, or you can enter the gross in the 'Amount' box and the VAT will be worked out from that. You'll see a breakdown of the net and VAT on the left side of your screen.
In some cases, you may be VAT registered and working with a client where VAT shouldn't be charged. If this is ever the case, you can use the 'VAT Rate' drop down box to change the VAT rate. If you're unsure if VAT should be charged or not, please check with our accountants.
Late Payment Reminders
Late payment reminders can be extremely handy. Not only do they save time, but they can also help to avoid those awkward late payment conversations if you ever need to chase an outstanding payment/debt.
If you’d already set up a late payment reminder for this client when adding them to your account, you’ll see it displayed here automatically using the settings you specified at the time - you can still amend this at this stage, though, if you want to:
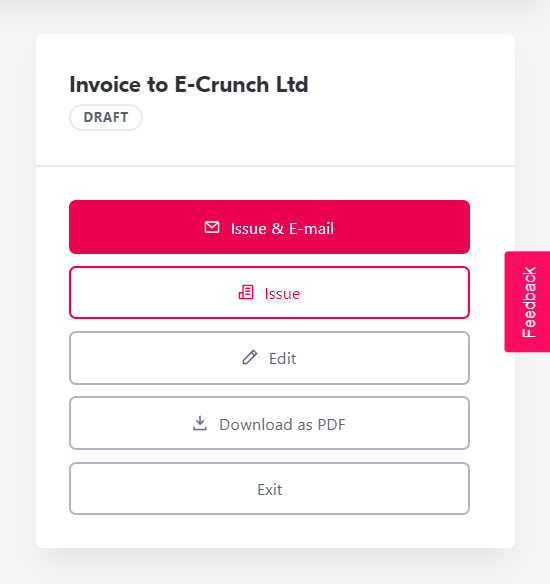
Issuing your invoice
When you're happy with your draft, click 'Save & View'. On the next screen, you'll be able to see how your invoice will look to your client.
If you want your invoice to remain as a draft for the time being then select 'Exit' to return to your list of invoices:
Tip: You may notice that the “Invoice number” is shown as “Pending” - the reason for this is due to the earlier-mentioned use of an automatic invoice numbering system being applied only when a sales invoice has been issued.
If you're ready to issue the invoice you'll have two options.
Issue & e-mail
This allows you to issue the official invoice and email it directly to your client through your account, saving you the time and hassle of having to download it, print it off, and send it manually through your own email account, or sending it via post.
When you select this option, you’ll see something similar to this:
From here, you’ll be able to select, or add, the email address(es) you want to include when sending your sales invoice, amend the email subject (it automatically populates with the invoice number using the dynamically generated number system) and the email body content.
Once you’re satisfied with all of it, you can simply press the ‘Issue & E-mail’ button, as shown above.
Please note, if this option isn’t available to you it will show as “greyed out”. If you haven’t included your clients’ contact details (email address) when adding them to your account, this will not be available to you. In order to activate this option, you’ll need to edit your clients’ details and enter the contact details.
Issue
If you simply issue the invoice (without email), you’ll need to download the invoice as a .pdf and manually email, or post it to your client. In some instances, you may not actually need to send it to your client and are merely recording it for bookkeeping purposes, ie you’re just reflecting a timesheet or work already carried out. In this scenario, you should use this option instead.
Switching to Classic
While we continue our ongoing rebuild of the Sales tab, you may need to toggle back to classic to access some features.
To do this simply click the toggle at the top of your account:
In classic mode you'll be able to:
Add multiple line items
Include bank details as default
Create quotes / estimates from draft invoices
Raise a similar invoice
Raise a credit note.
Don't worry, we'll be adding these features and more to our Beta as soon as possible!
This article explains how to create, issue and email sales invoices using your Crunch account.